​​The Shavingwood Workshop
  • Home
  • Blog
  • Portfolio
  • How to & Projects
  • Merch and Apparel

The Linen Press Build

10/22/2020

0 Comments

 
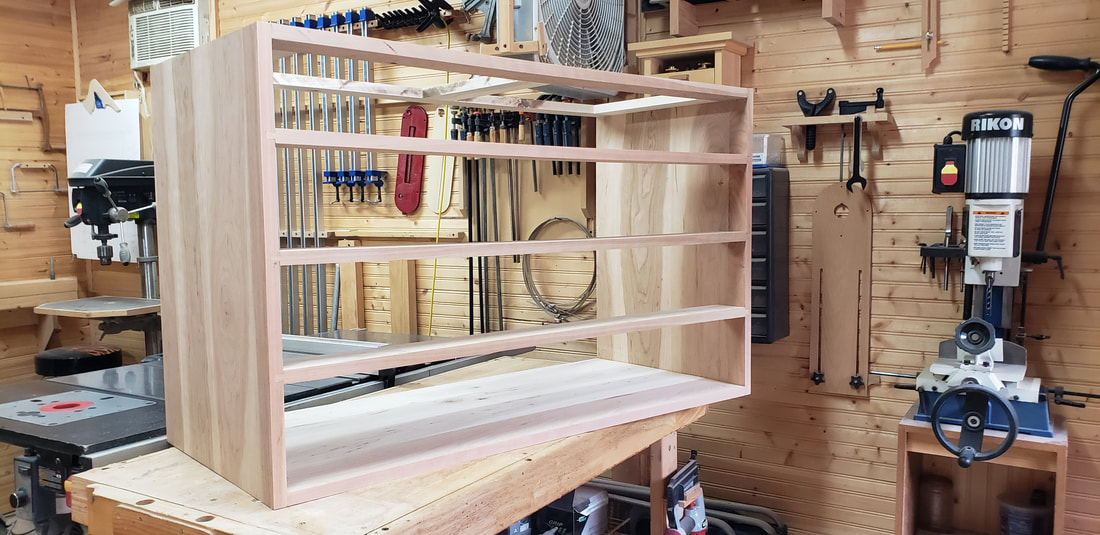
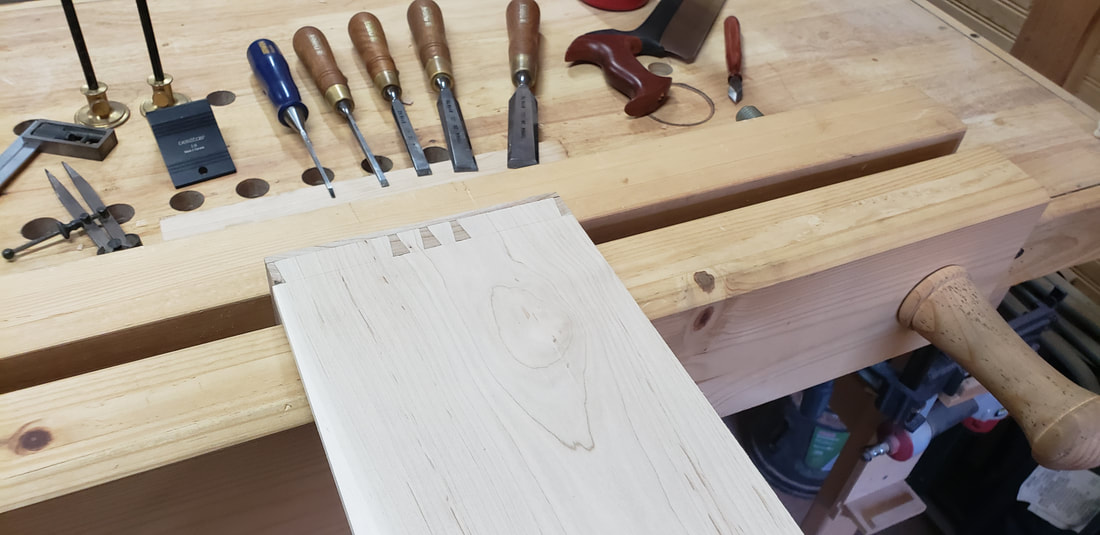
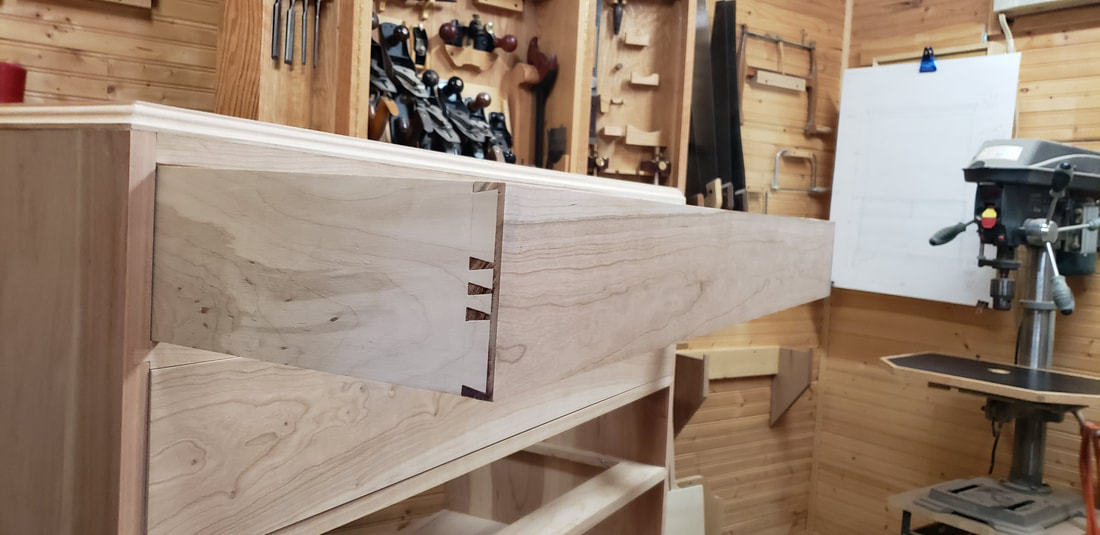
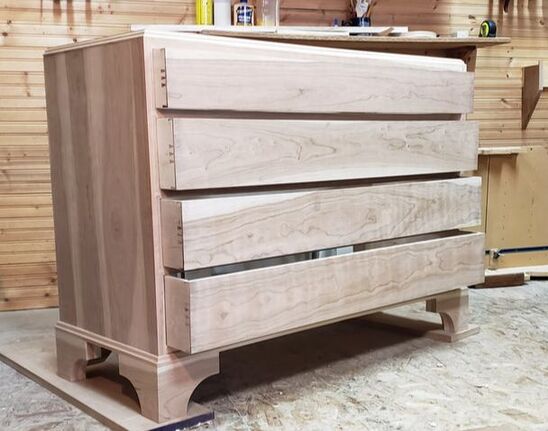
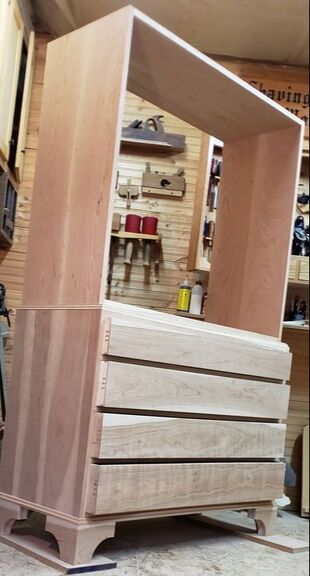
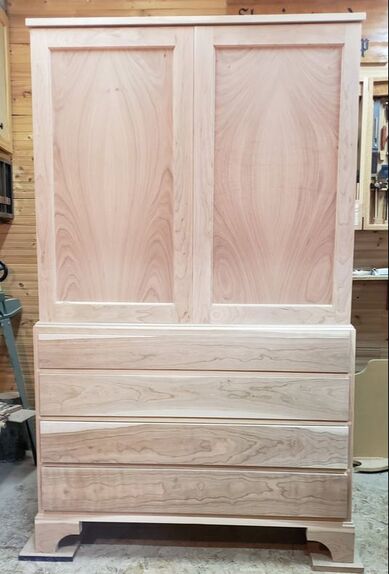
The linen press build is under way,  And for this project I choose cherry for the main material with the secondary being maple. The build started with the carcass for the lower half of the cabinet, I assembled this using half blind dovetails to connect the top and bottom with the sides, and for the frame that makes up the top I used maple with cherry for the front stretcher assembling the frame with mortise and tenon joinery.  Once the carcass was together I did the drawer dividers installing them to the case with exposed dovetails, and for the runners I attached them to the drawer divider with a tenon at the front using no glue and one nail to the back, the only glue I applied was at the center of the runner to allow for wood movement.  
Picture
Picture
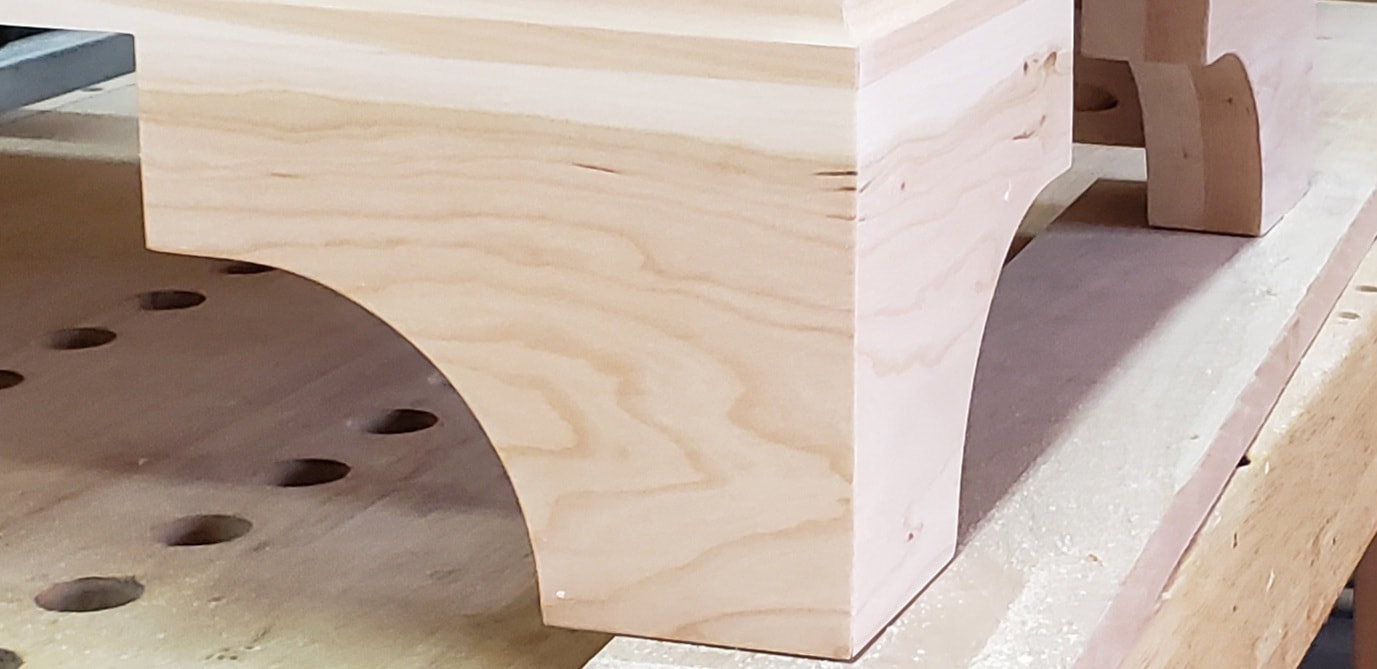
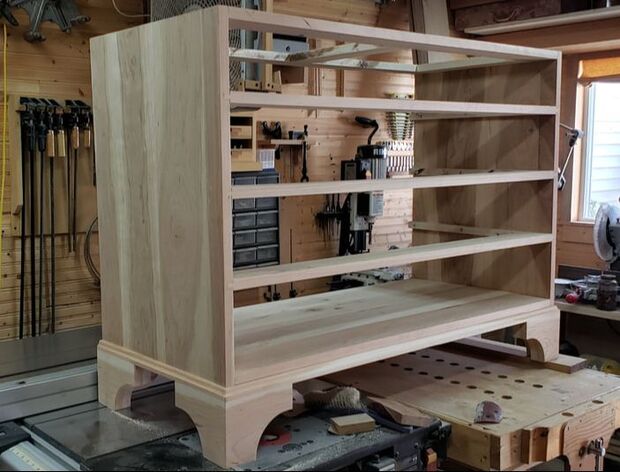
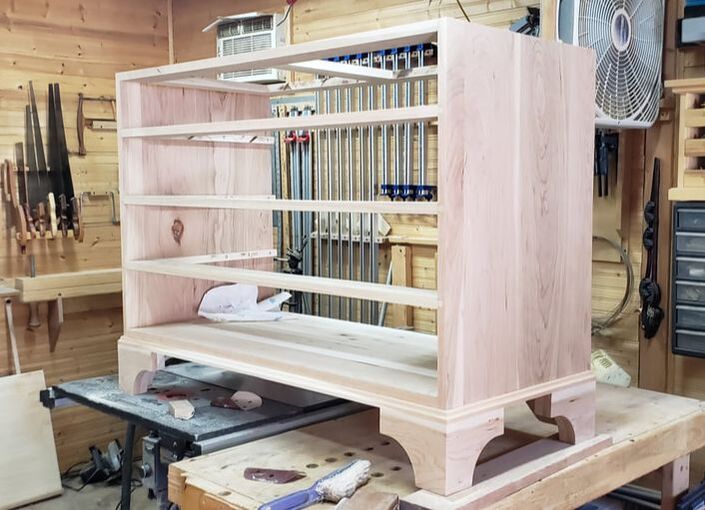
With the lower carcass together I was able to create the base frame for the feet to attach too, the frame is one inch thick by four inches wide and joined with mitered corners and a half inch thick spline to add strength to the joint. I did created a profile to the edge using a scratch stock that I can only describe as sort of ogee in appearance. Once the base frame was attached I moved on to making the footings, using a simple foot design I have been using for a long time now in projects like the hall tree I built and few others.  
Picture
Picture
I could now focus on the drawers and dovetails where the only choice, using maple for the sides and bottoms and of course cherry for the faces. The big issue I had with this build was it is such a simple design I wanted to do something to make it stand out and the only way I could see to do it was in the details, things like the spacing of the dovetails. a small detail really but enough of one to make a big difference with out it being so much it pushed it over the top.  I also spent what seemed like hours agonizing over the cherry I had trying to pick the best layout and boards for the faces, and I'm pretty happy with end result of both.
Picture
Picture

​Once I had all the drawers done it was a matter of fitting the drawers to the cabinet. My main focus when I do this is always in the spacing between the drawer face and the cabinet itself, I want to make sure that it is the same across all the drawers. It's little details but these are details that stand out from across a room when they are not right. Once the drawers were fitted I created the waist molding / upper frame to transition from the lower case to the upper, I assembled this frame the same way I did the lower frame but using a little different profile. 
Picture
Picture
Finally I could start building the upper case, I assembled the carcass with blind dovetails cutting a rabbet to the back side of the case for the back panel. The upper half of this linen press will have two  shelves so the next thing I did was drill the holes that will except the pins for the shelves so they can be adjusted, I allowed for three adjustments at each spot where the shelves will be. 
With all that done it was time for what is probably the most dominate feature of this project, the doors. When I was looking at the cherry I bought for this project I could see the flame pattern in this one board, I knew that I would have to resaw the board then book match the two panels to get it but yep there it is. Now this right here is the reason I'm always talking about how much time I spend just studying the material I'm using looking for those hidden jems. For the frames of the doors they are a shaker style assembly with a added bead detail where the styles and rails meet the door panel. At this point the last thing to address was the crown on the top of the case, I built this the exact same way as I made the bottom and middle frames the only difference is this one has no profile to it, all I did was soften the edges allowing for the same amount of over hang as the base. 
Now everything assembled I am at a stand still as I wait for the hardware. Looking back at this project the only real issue that I ran into was not really an issue but more of a mistake I almost made.  When I was figuring the depth of the upper case I forgot to account for the depth of the doors, had I realized this after cutting the dovetails I would have been remilling new stock for the upper case, but like Norm always said measure twice and cut once.
Picture
Picture
Picture
0 Comments

    The Shavingwood Workshop Blog


    Join Tommy as he shares his opinions, thoughts and current happenings in his woodshop world.

    Archives

    June 2024
    May 2024
    July 2023
    June 2023
    December 2022
    January 2022
    December 2021
    November 2021
    August 2021
    February 2021
    January 2021
    December 2020
    October 2020
    August 2020
    July 2020
    June 2020
    May 2020
    November 2019
    October 2019

    Categories

    All

    RSS Feed

Powered by Create your own unique website with customizable templates.
  • Home
  • Blog
  • Portfolio
  • How to & Projects
  • Merch and Apparel